Multi-Contact MA213-01 Manuale d'uso
Pagina 10
Advanced Contact Technology
10 / 12
www.multi-contact.com
42
43
41a
41b
D
D
(ill. 41a)
Inserzione CT-0,6
Usando l’utensile di montaggio
CT-E-WZ0,6, inserire i contatti dalla
parte numerata del guscio fino a quan-
do si arriva ad un punto di arresto�
(ill. 41a)
Installation CT-0.6
Using the assembly tool CT-E-WZ0.6,
press the contacts into the contact
inserts from the numbered back side
as far as the stop�
(ill. 41b)
Rimozione CT-0,6
Inserire l’utensile d’estrazione
CT-A-WZ0,6 nella parte frontale del
guscio fino a quando si sente un click.
(ill. 41b)
Removal of CT-0.6
Insert dismantling tool CT-A-WZ0,6
into the contact insert from the front
until a click is heard. Then, if neces-
sary, push the pin (D) to extract the
contact from the carrier�
Nota:
Al fine di garantire un fissaggio
sicuro dei contatti nel porta contatti,
essi non devono essere estratti più di
2 volte e inseriti più di 3 volte.
Note:
In order to quarantee a firm
fixation of the contacts in the contact
carriers, the contacts may not be
extracted more than 2 times and
inserted more than 3 times.
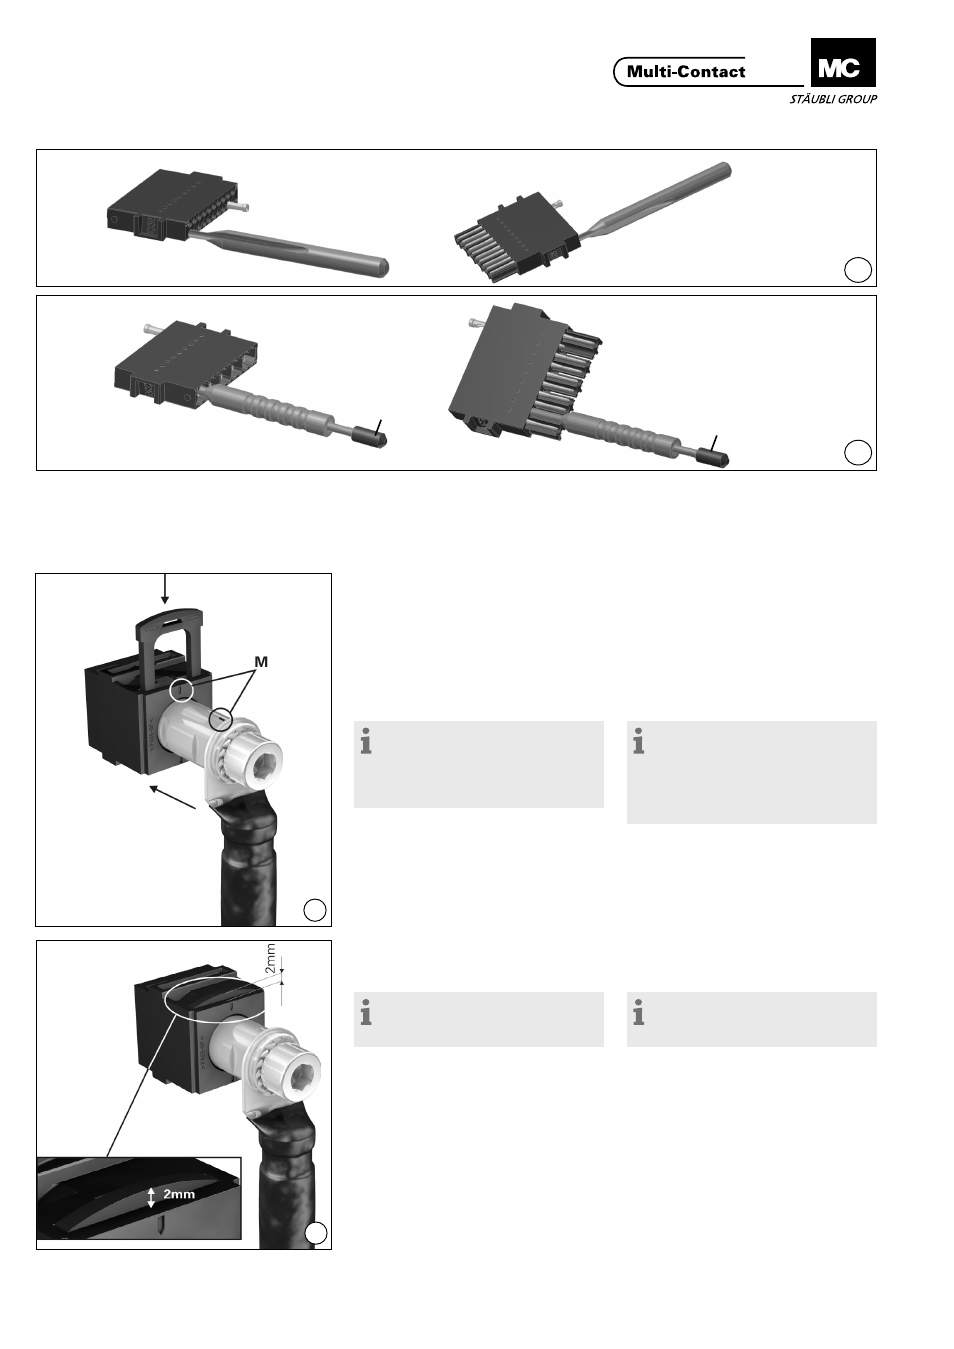
(ill. 42)
Al montaggio dei contatti 12 mm, le 2
marcature (M) devono essere allinea-
te. Il contatto viene inserito fino in bat-
tuta e fissato con un clip di bloccaggio
(può essere inserito sui due lati ed è
fissato all’avviso sonoro di un clic).
(ill. 42)
When mounting the 12 mm contact
with external thread, the markings on
both the carrier and the contact must
be aligned� The contact is then insert-
ed to the end position (can be inserted
in both side) and secured with retain-
ing clip� Engaging by audible clic�
Nota:
Altezza dopo l’inserimento: 2 mm
(ill. 43)
Note:
Height in inserted condition: 2 mm
(ill. 43)
Il clip di montaggio si toglie con l’aiuto
di un cacciavite (No�2)�
The retaining clip can be removed
with a commercial screwdriver
(size 2)�