Multi-Contact MA260 Manuale d'uso
Pagina 5
Advanced Contact Technology
www.multi-contact.com
5 / 8
16
14
15
17
13
(ill. 13)
4. Controllare visivamente la crim-
patura.
(ill. 13)
4. Visually check the crimp.
Avvertenza:
per le operazioni con la pinza per
crimpare, vedere MA251
www.multi-contact.com
Note:
to the operation of the crimping
pliers, see MA251, www.multi-
contact.com
Test di montaggio
Assembly control
(ill. 14)
Inserire il contatto crimpato
nell’isolamento del connettore fem-
mina o maschio fi nché non scatta
in posizione. Tirando leggermente il
cavo, assicurarsi che la parte metallica
sia collegata in modo corretto.
(ill. 14)
Insert the crimped-on contact into the
insulator of the male or female coupler
until it clicks into place. Pull gently on
the lead to check that the metal part is
correctly engaged.
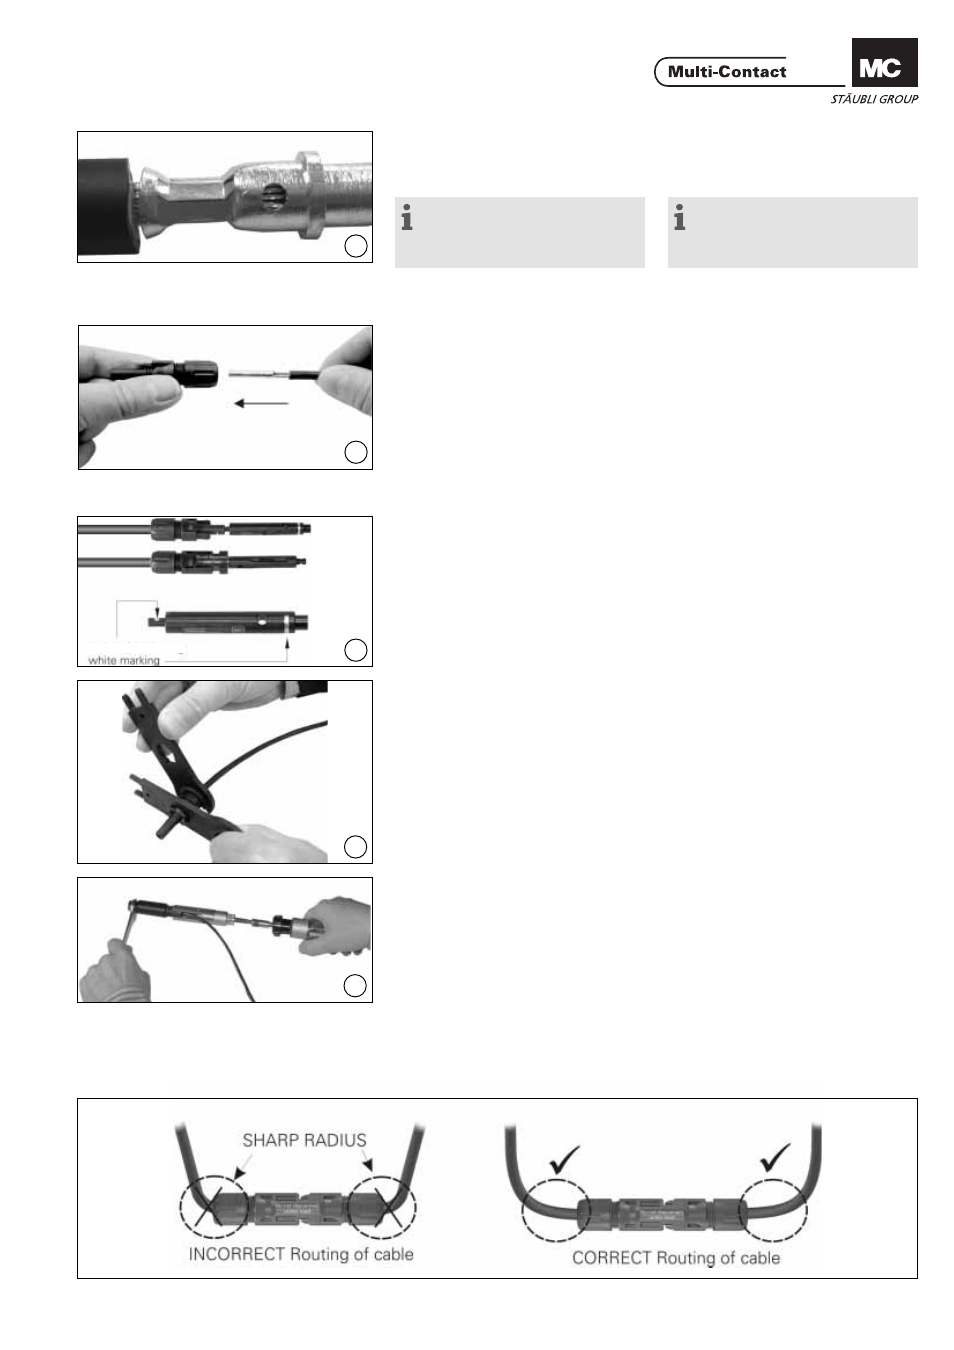
(ill. 15)
Inserire il pin di test con il lato corris-
pondente nella presa o nella spina fi no
alla posizione di arresto. Se il contratto
è montato correttamente, il marchio
bianco sul pin di test deve essere
ancora visibile.
(ill. 15)
Insert the appropriate end of the test
pin into the male or female coupler as
far as it will go. If the contact is cor-
rectly located, the white mark on the
test pin must still be visible.
(ill. 16)
Avvitare il pressacavo con le chiavi
PV-MS
o
(ill. 16)
Screw up the cable gland hand-tight
with the tools PV-MS
or
(ill. 17)
Avvitare il pressacavi con l‘utensile
PV-WZ-AD/GWD e PV-SSE-AD4.
(ill. 17)
Tighten the cable gland with the tools
PVWZ-AD/GWD and PVSSE-AD4.
Angolo di curvatura del cavo
Cable routing
Fare riferimento ai dati del costruttore
per il minimo raggio di curvatura.
Refer to cable manufactures specifi ca-
ton for minimum bending radius.
marchio bianca