Multi-Contact MA213-06 Manuale d'uso
Pagina 4
Advanced Contact Technology
7
4
6
S
8
S
5
Fabricante/Producer:
Multi-Contact AG
Stockbrunnenrain 8
CH – 4123 Allschwil
Tel.
+41/61/306 55 55
Fax
+41/61/306 55 56
www.multi-contact.com
© b
y
Multi-Contact A
G, Switz
erland – MA213-06 – 08.2012, Inde
x c
, Global Communications – Sujeito à alterações / Subject to alterations
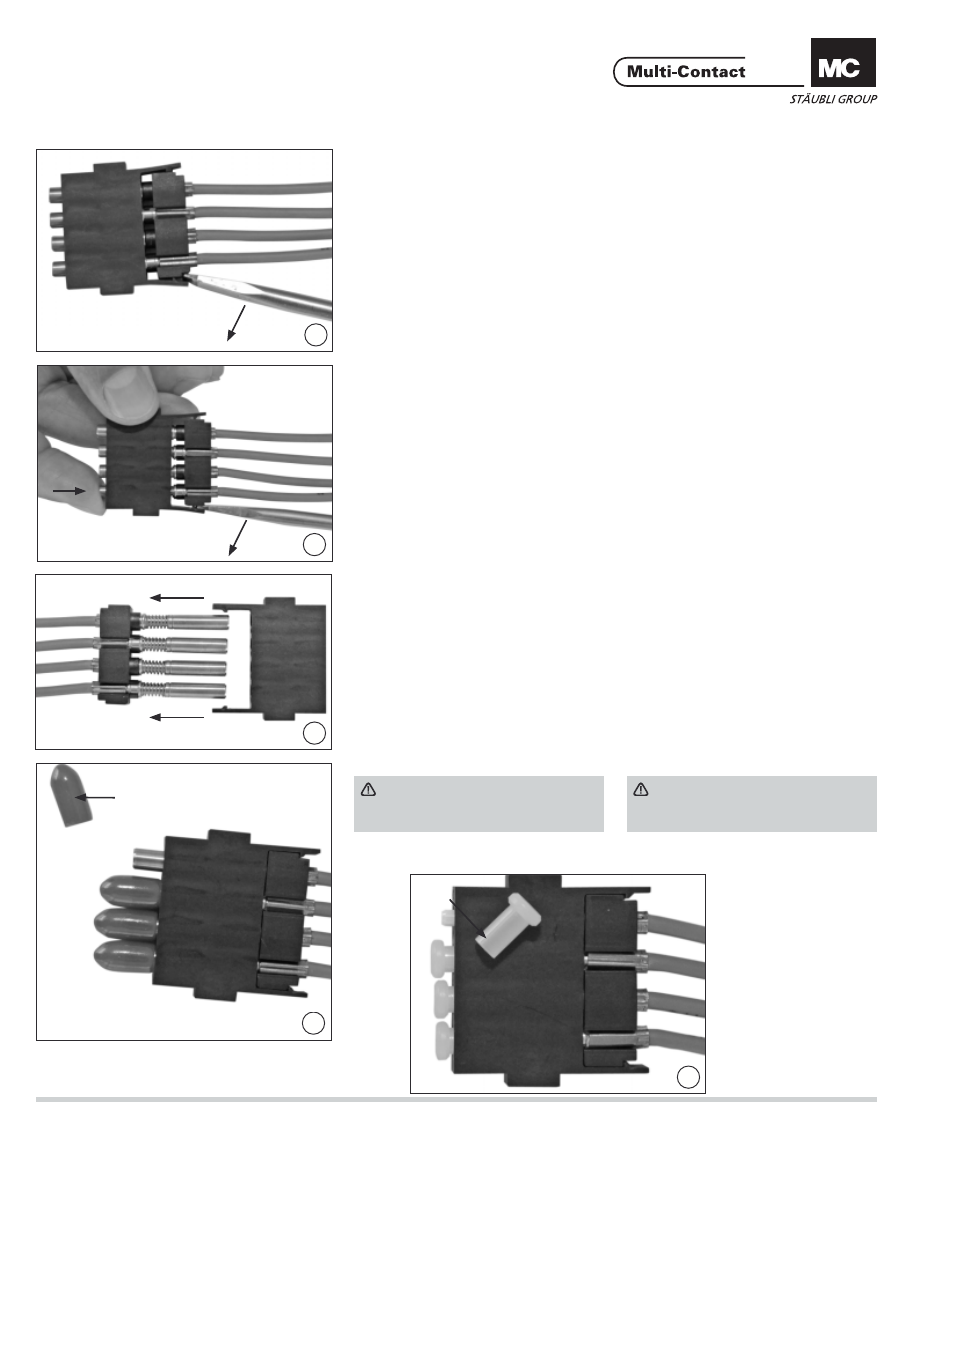
Smontaggio
Disassembly
(ill. 4)
Piegare leggermente verso l‘esterno le
linguette di fi ssaggio. A seconda della
posizione, è possibile aiutarsi con un
cacciavite.
(ill. 4)
Bend the retaining latch slightly out-
wards. Depending on the installation
position, a screwdriver may be used.
(ill. 5)
Esercitare una pressione sui contatti
dal lato di connessione fi nché la pias-
tra di supporto non viene spinta fuori.
Ripetere l‘operazione per la seconda
linguetta di fi ssaggio.
(ill. 5)
From the plugging side, exert pressure
on the contacts until the holding plate
is pushed out of the retention. Repeat
operation on the second retaining
latch.
(ill. 6)
Estrarre la piastra di supporto con
i contatti dal porta contatti. In caso
di contatti maschi, si consiglia di
esercitare una pressione sui contatti
utilizzando un contatto femmina non
assemblato. In questo modo è possi-
bile esercitare una pressione maggiore
e proteggere anche la superfi cie termi-
nale delle fi bre da danni e sporcizia.
(ill. 6)
Pull holding plate out of the contact
carrier with the contacts. When deal-
ing with pin contacts, it is recom-
mended to exert pressure on the
contacts with an unassembled socket
contact. This enables greater pressure
to be exerted and protects the end
surface of the fi bres from damage and
dirt.
Cappucci di protezione
Protective caps
Contatti pre-assemblati con cap-
puccio di protezione (ill. 7-8)
Pre-assembled contacts with pro-
tective caps (ill. 7-8)
Attenzione
Togliere tutti i cappucci di protezi-
one (S) prima della connessione.
Attention
Before plugging, remove all the
protective caps (S).