Multi-Contact MA213-04 Manuale d'uso
Pagina 5
Advanced Contact Technology
www.multi-contact.com
5 / 8
8
9
CT-NET-AWZ
D
10
11
12
13
14
(ill. 8)
Inserire i contatti dal lato posteriore
nell‘inserto, fino al bloccaggio.
(ill. 8)
Push the contacts through the num-
ber indicated side until they lock into
place�
Attenzione
Chiudere tutti i fori non occupati
da contatti con gli appositi tappi
Attention
Any unoccupied contact slots
should be fitted with blind plugs.
Estrazione dei contatti
Contact extraction
(ill. 9)
Inserire l‘Utensile di smontaggio CT-
NET-AWZ dalla parte frontale nel‘in-
serto fino ad udire un „click“. Quindi
con il punteruolo D spingere fuori il
contatto�
(ill. 9)
Insert the extraction tool CT-NET-AWZ
from the front side into the contact
slot until you hear a click� Then with
the drift D push out the contact�
Montaggio dell‘inserto nel
modulo portainserti
Assembly of the contact in-
serts into the contact carrier
(ill. 10)
Spingere l‘anello di ritenuta Z sull‘in-
serto K�
far combaciare la linguetta F con la
zona piatta dell‘inserto�
(ill. 10)
Connect the retaining ring Z to the
contact insert K� Place the leading part
F over the flat area of the insert K.
(ill. 11)
Rimuovere il nastro adesivo e tagliare
la schermatura in modo che possa es-
sere ripiegata sopra l’anello di ritenuta
per circa 3 mm.
(ill. 11)
Remove adhesive tape and cut the
screening wires so that they can be
layed approx. 3 mm over the retaining
ring�
(ill. 12)
Appoggiare la schermatura sull’anello
di ritenuta�
(ill. 12)
Lay the screening wires over the
retaining ring�
Avvertenza:
L’anello di ritenuta deve stringere
la parte finale dell’isolamento del
cavo.
Note:
In the end position, the retain-
ing ring must clamp the outer cable
insulation.
(ill. 13)
Spingere la bussola filettata M sopra
l’anello di ritenuta Z�
(ill. 13)
Push nut M over the retaining ring Z�
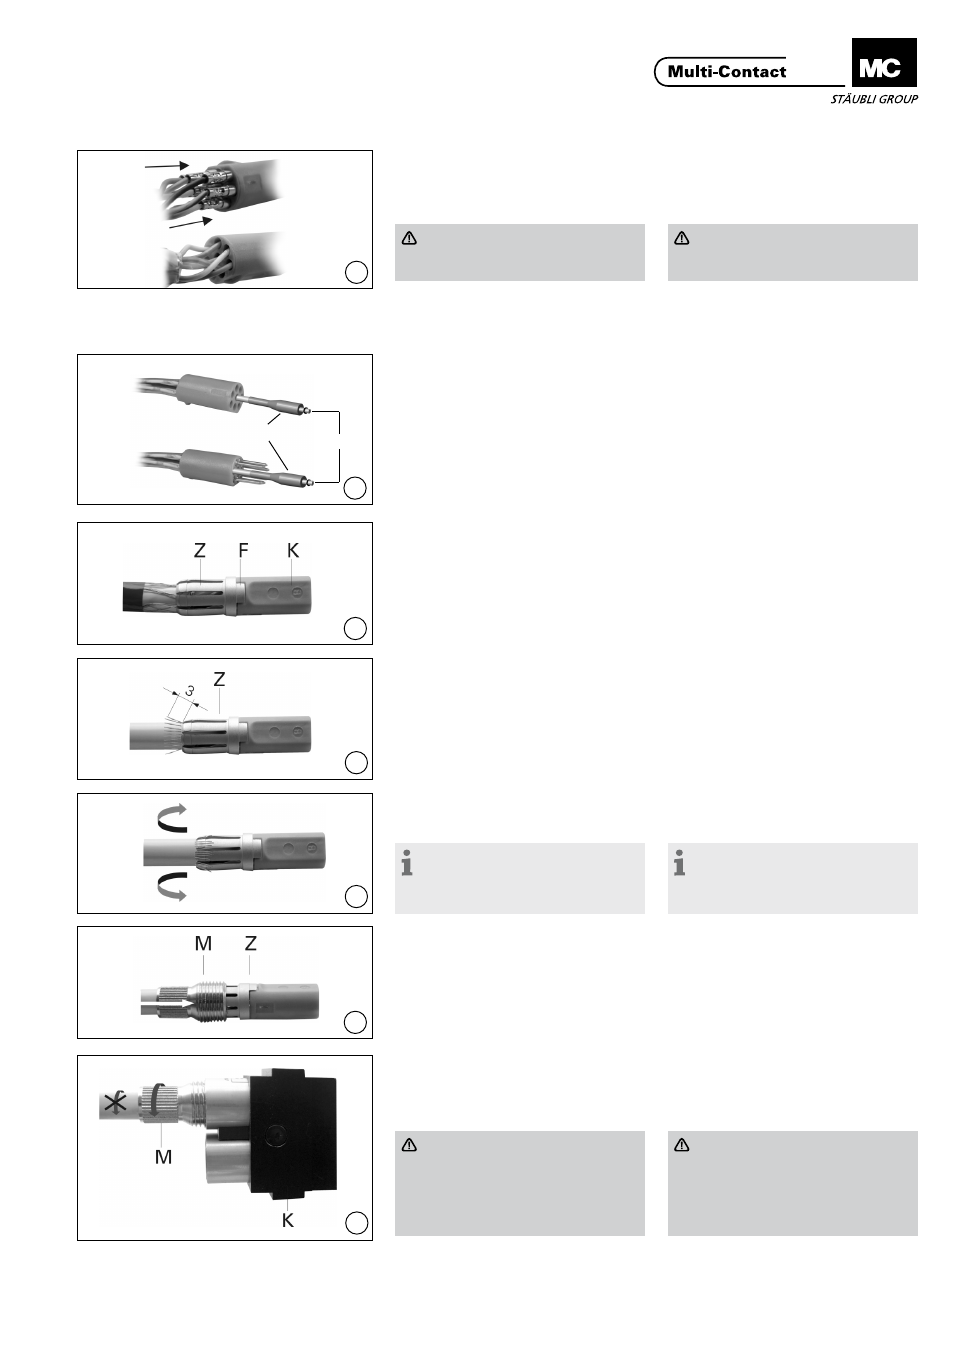
(ill. 14)
Inserire il tutto nel porta inserti K�
Controllare il corretto posizionamento
della parte piatta�
Serrare la bussola M e tenere allo
stesso tempo il cavo per evitare qual-
siasi rotazione�
(ill. 14)
Insert the whole unit in the contact
carrier K� Ensure that the position of
the flat part is correct. Tighten nut M
while holding the cable to avoid any
cable rotation�
Attenzione:
Chiudere il dado manualmente
(senza utensili)�
La filettatura visibile dopo il
serraggio del dado dipende dal
diametro esterno del cavo�
Attention
Tighten the nut only by hand (wit-
hout tools)� The amount of thread
that is visible after tightening
the nut depends on the outside
diameter of the cable�