Multi-Contact MA213-02 Manuale d'uso
Pagina 4
Advanced Contact Technology
4 / 8
www.multi-contact.com
7
8
9
10
11
12
13
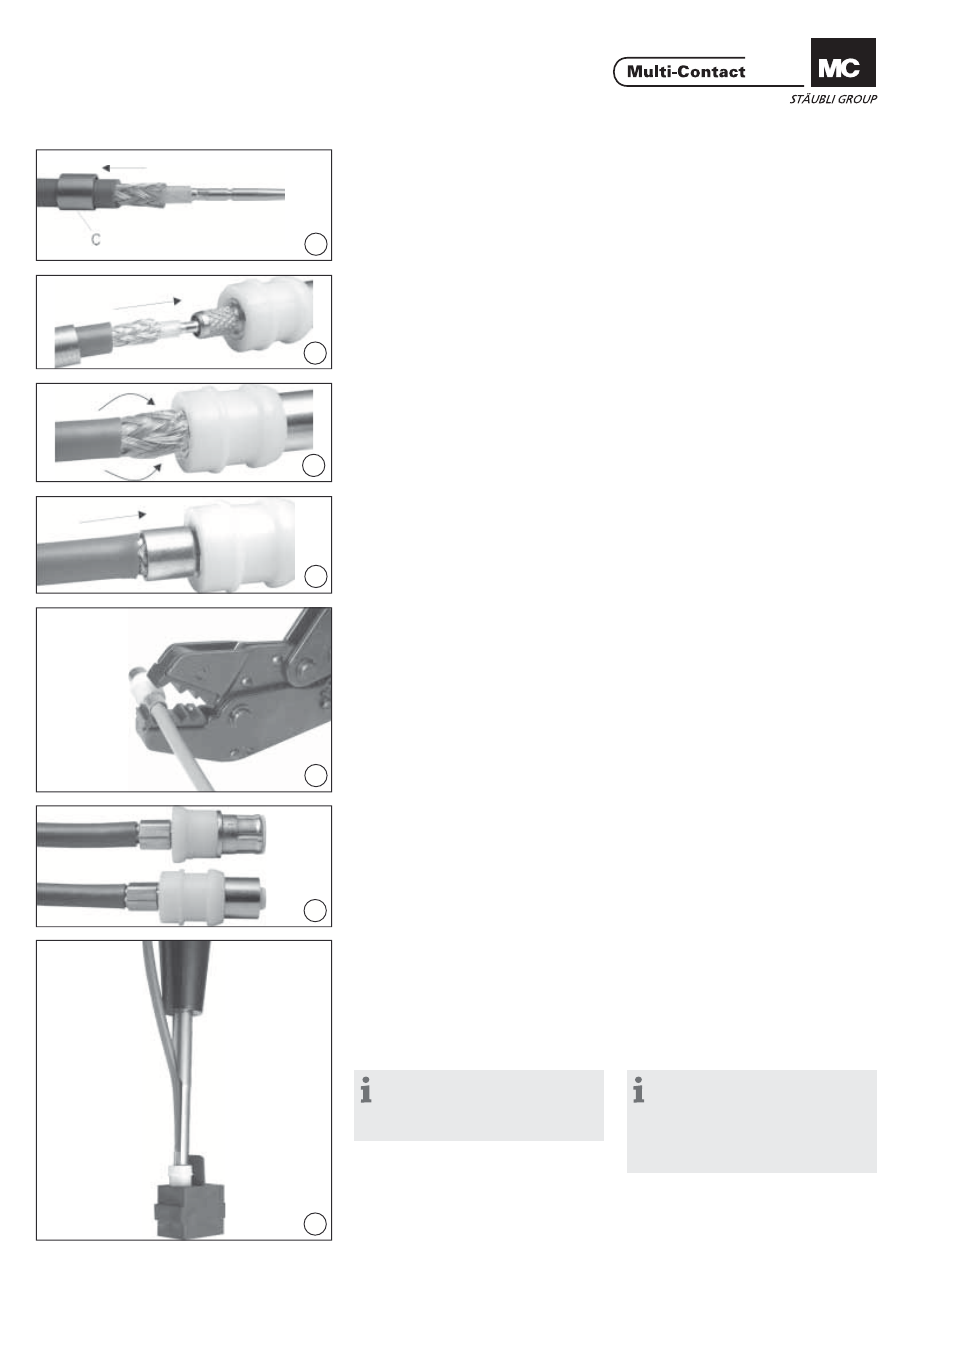
(ill. 7)
Far scorrere la bussola di crimpaggio
C sul cavo.
(ill. 7)
Slip crimp sleeve C onto the cable.
(ill. 8)
Introdurre il cavo nell’alloggiamento a
crimpare fi no a che il contatto si inne-
sta sull’isolamento interno.
(ill. 8)
Insert the cable into the crimp housing
until the contact engages in the inner
insulator.
(ill. 9)
Far scorrere la calza schermante
sull’alloggiamento a crimpare.
(ill. 9)
Push the shield wires over the crimp
housing.
(ill. 10)
Far scorrere la bussola di crimpaggio
sulla calza schermante...
(ill. 10)
Slip the crimp sleeve over the shield.
(ill. 11)
...e crimpare nella posizione desidera-
te (58 o 59).
(ill. 11)
Crimp the crimp sleeve in the re-
quired position 58 or 59.
(ill. 12)
La procedura di montaggio è identica
per femmine e maschi.
(ill. 12)
The assembly steps for sockets and
pins are similar.
(ill. 13)
Servendosi dell’apposito attrezzo
ME-WZ5 inserire a fondo i contatti
nel porta contatti. L’inserimento dei
connettori coassiale risulta semplifi ca-
to se il porta contatti viene dapprima
inumidito con alco per uso industriale.
(ill. 13)
Insert the contacts in the contact car-
rier by means of the inserting tool
ME-WZ5 until they engage. The inser-
tion of the coaxial connectors can be
facilitated by previously wetting the
contact carriers with industrial alcohol.
Nota:
per evitare di danneggiare il porta
contatti spingere gli attrezzi di inseri-
mento parallelamente all’asse.
Note:
To avoid damage to the contact
carriers, the inserting tools must
be guided parallel to the axis and
the pressure should be distributed
circular.