Campomatic C64CN Manuale d'uso
Pagina 13
11
INSTALLATION:
Precautions for the installation
Installation must always comply with current laws.
Check that the electrical system complies with
standards and can support the load of the
appliance (refer to the serial tag). The
manufacturer shall not be held liable if safety
standards are not observed.
The installation of the appliance and the
connection to the electric mains, including any
necessary modification to the domestic systems,
must only be carried by qualified personnel.
Install the machine in a horizontal position.
Suitably fix the unit containing the device to the
wall to avoid the risk of the unit falling forward
when extracting the device.
The appliance is heavy, move it with caution.
Carefully move the appliance taking care never to
turn it upside down.
Modifying or attempting to change the
characteristics of the appliance is forbidden.
The manufacturer declines any responsibility for
any damage caused to people or objects due to
modifications, accessories or devices of any type
applied to the appliance and not expressly
mentioned in this manual.
Ensure good circulation of air around the
appliance: make sure that the air vents provide a
good exchange and are not obstructed.
Installation and first use
Attention: it is necessary that these operations
are carried out by qualified technical
personnel.
Attention: For direct connection to the
network, you need a device that ensures the
network disconnection with a contacts
opening distance allow the complete
disconnection in the conditions of overvoltage
category III, according to the rules of
installation.
Attention: is necessary allow disconnection
device from the network after installation. The
disconnection can be obtained leaving free
access to the plug "M" or incorporating a
switch in the network according to the
installation rules.
For the installation follow the procedure indicated
below referring to the figures at the end of the
manual: (Fig. 1-2-3-7) Insert the plug “M” in the
socket and turn the main switch “G” to position 1
(ON). The buttons on the keypad will light up for
about 3 seconds to check that all signals are
working properly.
At the end of this phase, LEDS T5 and T6 will
start flashing until the boiler has reached the
optimal temperature for dispensing of coffee.
When used for the first time, or after a long period
of disuse, the pipes and dispensing assemblies
(run the machine without coffee) to get rid of any
impurities or encrustations in the pipes, in order to
ensure proper hygiene. You should also throw
away the first coffees as they may have an
unpleasant taste.
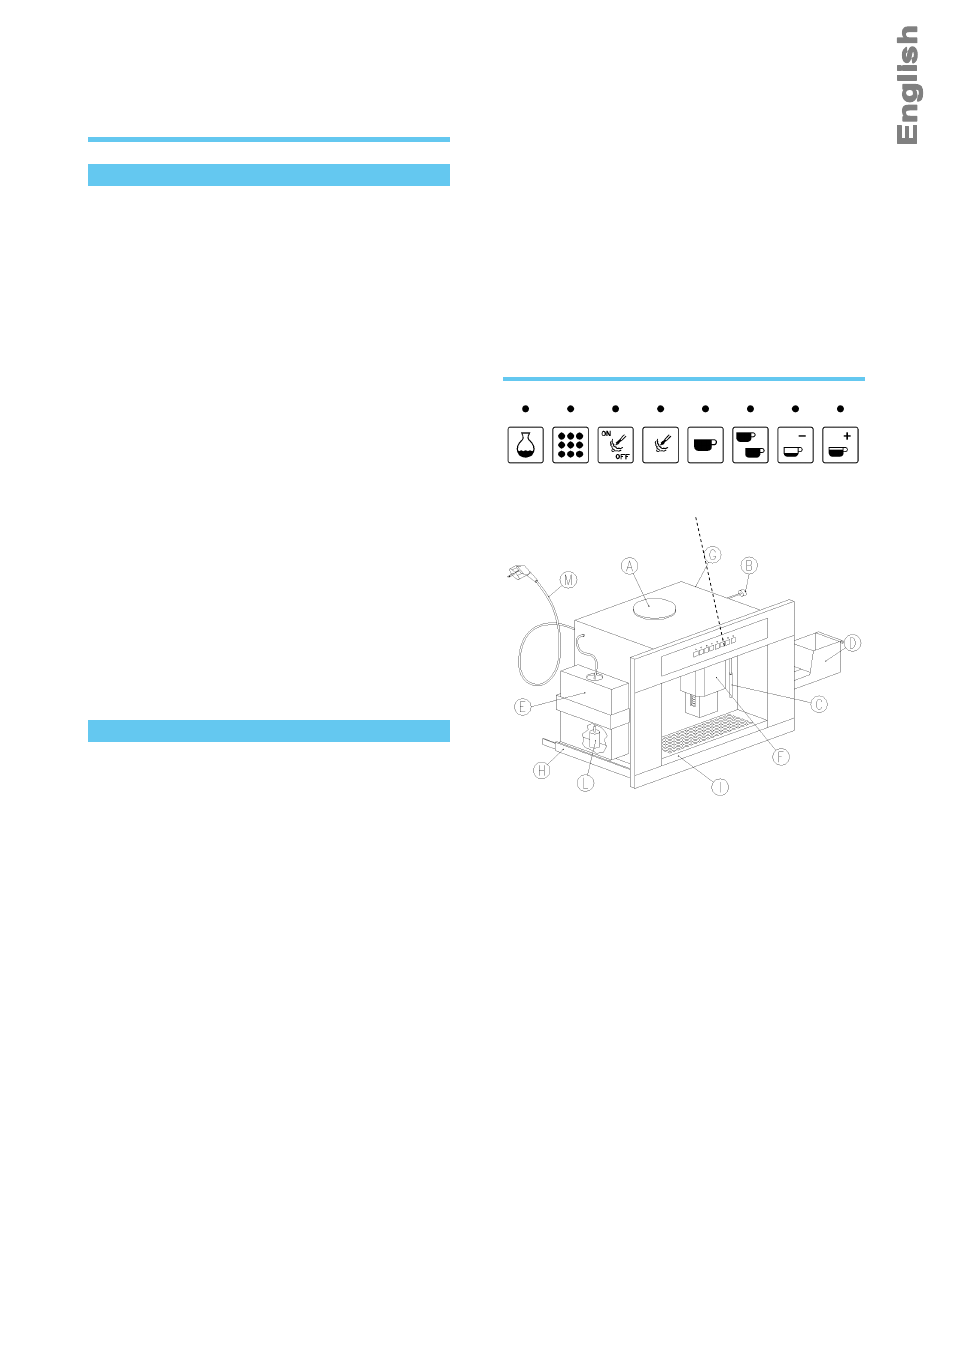
APPLIANCE DESCRIPTION
Legend:
A) Coffee bean container
B) Coffee grinding adjustment knob
C) Steam nozzle
D) Removable drawer for pods
E) Water tank
F) Coffee dispenser
G) ON/OFF main switch
H) Guide for appliance extraction
I) Cup shelf with built-in water tank
L) Softening filter
M) Electrical plug
Control panel:
T1) No water in tank
T2) Emptying drawer for pods
T3) Steam boiler activation
T4) Steam or water dispensing
T5) Single coffee dispensing
T6) Double coffee dispensing
T7) Decrease coffee dose
T8) Increase coffee dose
T1
T2 T3 T4 T5 T6 T7 T8
11