Proel CSB10 Manuale d'uso
Pagina 6
Advertising
Installation
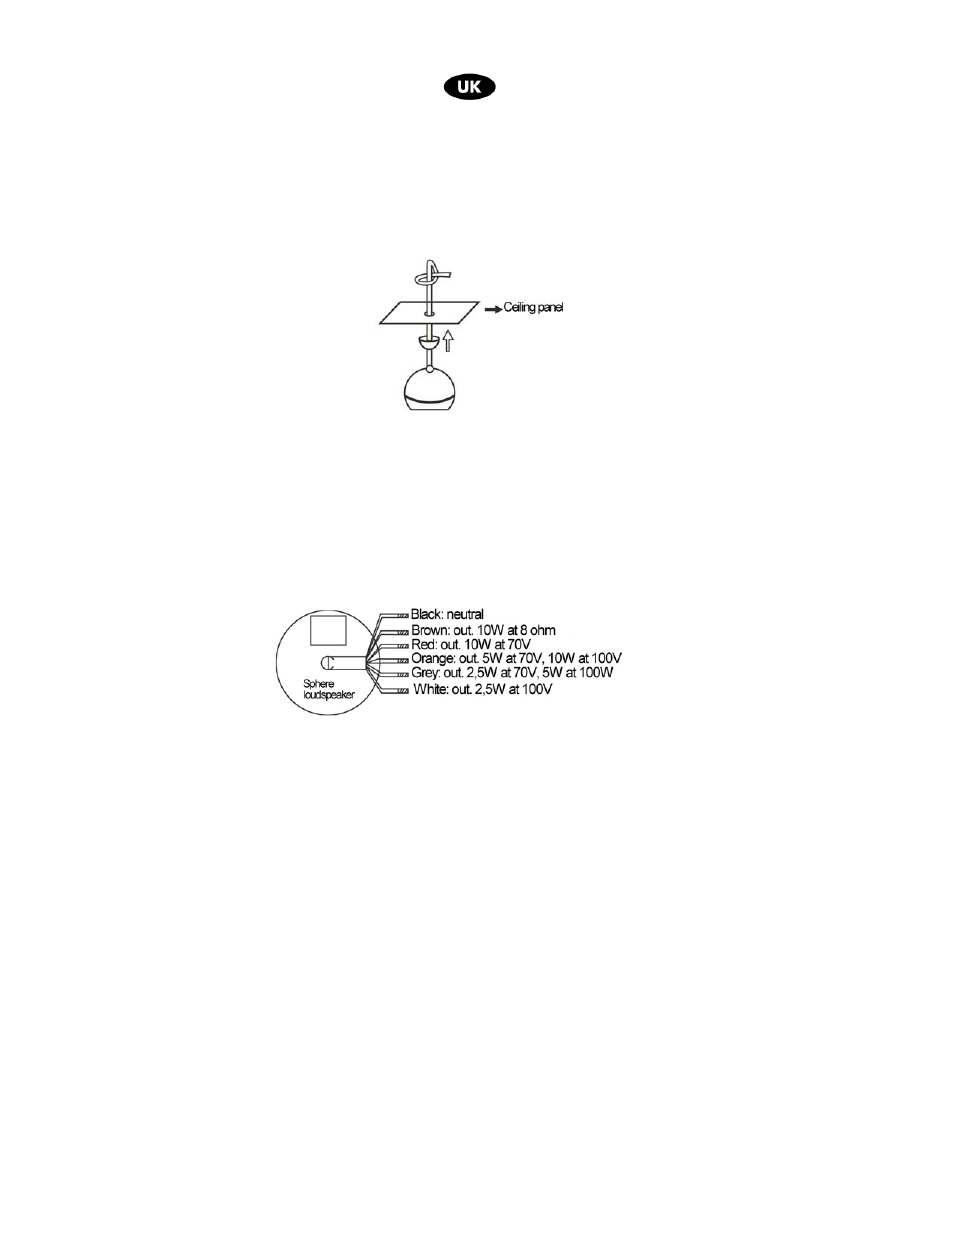
1. A hole (Ø 7-8mm) should be made in the ceiling panel. Insert the
connection cable in the cap used for covering the hole first, and then in
the hole. Place the CSB10 at the height required and fix it by tying a
knot on the cable. Slide the cover to the ceiling panel.
2. The input voltage and the output power can be chosen by connecting
the input line to the unit. For details about the connection, refer to the
instructions shown on the unit or to the illustration below:
Advertising
Vedi anche altri documenti nella categoria Casse Proel:
- BM100A (Pagine: 10)
- TXTOUR (Pagine: 16)
- FREE8LT (Pagine: 28)
- FREE1 (Pagine: 24)
- FREE10 (Pagine: 40)
- FREE50V3 (Pagine: 32)
- MEG25 (Pagine: 8)
- PROX2 (Pagine: 16)
- MEG8 (Pagine: 8)
- FREE10 (Pagine: 40)
- FREE6 (Pagine: 36)
- WAP1 (Pagine: 8)
- CS4T (Pagine: 8)
- CS30HF (Pagine: 16)
- CSB20 (Pagine: 12)
- FGS10 (Pagine: 12)
- HD60T (Pagine: 10)
- CO120S15 (Pagine: 20)
- H16R (Pagine: 6)
- HSPL30 (Pagine: 8)
- HSPL40 (Pagine: 8)
- PR10ALEN (Pagine: 8)
- PR10AL (Pagine: 8)
- PR30PL (Pagine: 10)
- WS01 (Pagine: 4)
- WS04 (Pagine: 6)
- STONE (Pagine: 12)
- X50IWT (Pagine: 2)
- SE8W (Pagine: 8)
- CS6TALEN (Pagine: 10)
- CS06EN (Pagine: 12)
- XE65TW (Pagine: 16)
- V8A (Pagine: 16)
- SW115AV2 (Pagine: 20)
- SW110AV2 (Pagine: 16)
- FREEPASS10USB (Pagine: 20)
- FREEPASS6 (Pagine: 16)
- WAVE15A (Pagine: 28)
- FLASH5AV2 (Pagine: 16)
- WAVE15P (Pagine: 16)
- LT6P (Pagine: 16)
- LT812A (Pagine: 16)
- LT215A (Pagine: 20)